This article is from https://github.com/nbkolev/qnap-arm-hdsentinel
1. Enable SSH login
1.1 Go to Telnet/ SSH in ControlPanel

1.2 Tick the “Allow SSH Connection”

1.3 Do not forget to Apply

2. Login with SSH
Recent Microsoft Windows 10/11 have SSH client built-in. If you dont have a SSH client – download PuTTY or something similar.
2.1 Connect to the NAS
ssh -l <your_user_name> <nas_ip_address>

2.2 You have to agree (that the host is your NAS and NS.A/MO.SSAD/MI.5/K.GB… is not in the middle) by typing yes
2.3 Enter your password when prompted and press Enter
2.4 Type sudo -i in the prompt and press Enter and type your password again.
2.5 You have to be able to see the following screen:

Type Q + Enter
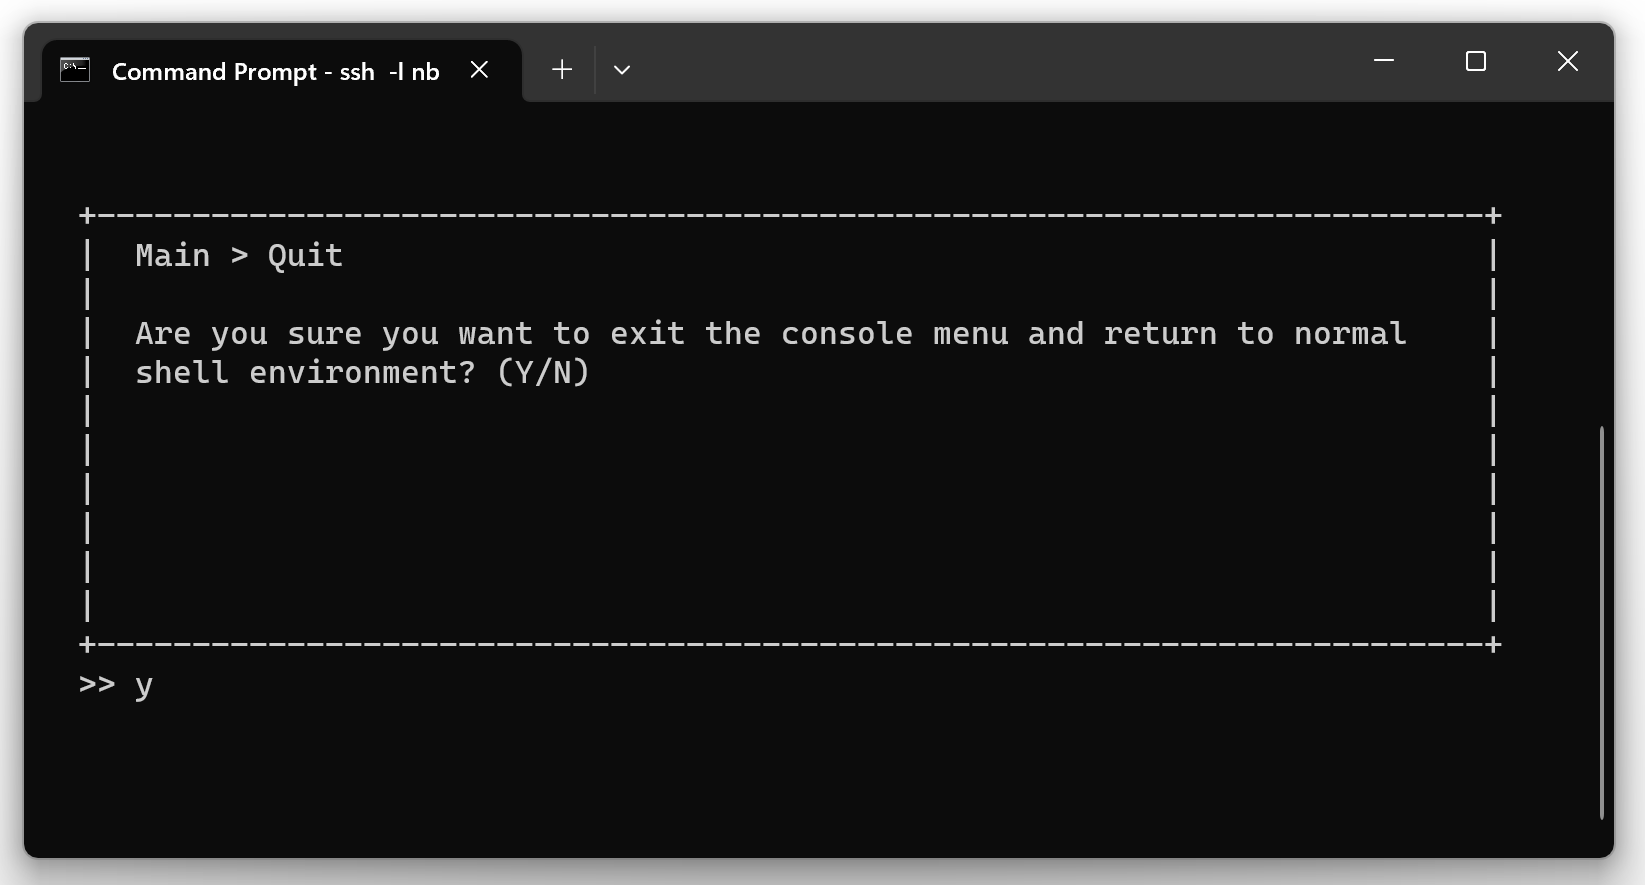
Now you are in the home directory of the administrator user you are using.
3. Download and test HD Sentinel console version
Disclarmer: Some folks might argue that the following procedure is not secure enough and it would be better if HD Sentinel executable is moved to /home/admin/.hdsentinel. My train of thought is that if administrator level user is compromised is irrelevant which one exactly…
Prerequisite: Following the steps of 2. Login with SSH, by using administrator user. With current directory the home directory of the user.
- Create directory .hdsentinel (the “.” symbol makes it hidden) in administrator’s user home dir (It could be any directory, nevertheless it has to be on a HDD as QTS will not preserve on reboot files anywhere else).
- Download HD Sentinel by using WGET (Warning: In case of running x86 QNAP, use the appropriate executable for the platform x86 from https://www.hdsentinel.com/hard_disk_sentinel_linux.php)
- Make the file executable
+x
mkdir .hdsentinel
cd .hdsentinel
wget https://www.hdsentinel.com/hdslin/armv5/hdsentinelarm
chmod +x hdsentinelarm
NOTE: If you are running x86 NAS do not forget to find the appropriate executable from the link above.
2.4 Perform a test run by typing ./hdsentinelarm and the output will be something like this:

If you see Permission denied probably the name of the executable has changed. Find it by typing ls and chmod +x <newname>.
4. Run HDD sentinel on schedule
4.1 Find the absolute path of the HDsentinel executable: find $(pwd) -name hdsentinelarm
Note the output will be something like:

you could try to find this folder symlinked in /share/homes/<YOUR_USER>/.hdsentinel/
4.2 I suggest to output the report file in the Public folder of the NAS in `/share/public/’
/share/homes/<YOUR_USER>/.hdsentinel/hdsentinelarm -r /share/Public/report.html -html
4.3 Add line in crontab file
*/10 * * * * /share/homes/<YOUR_USER>/.hdsentinel/hdsentinelarm -r /share/Public/report.html -html (launch on every 10 minutes and write output to /share/Public/report.html)
By either:
- use
vito manually edit/etc/config/crontab - or pipe
echo "*/10 * * * * /share/homes/<YOUR_USER>/.hdsentinel/hdsentinelarm -r /share/Public/report.html -html" >> /etc/config/crontabto append the line
4.4 Reload CRONTAB
crontab /etc/config/crontab && /etc/init.d/crond.sh restart
The output will be something like:

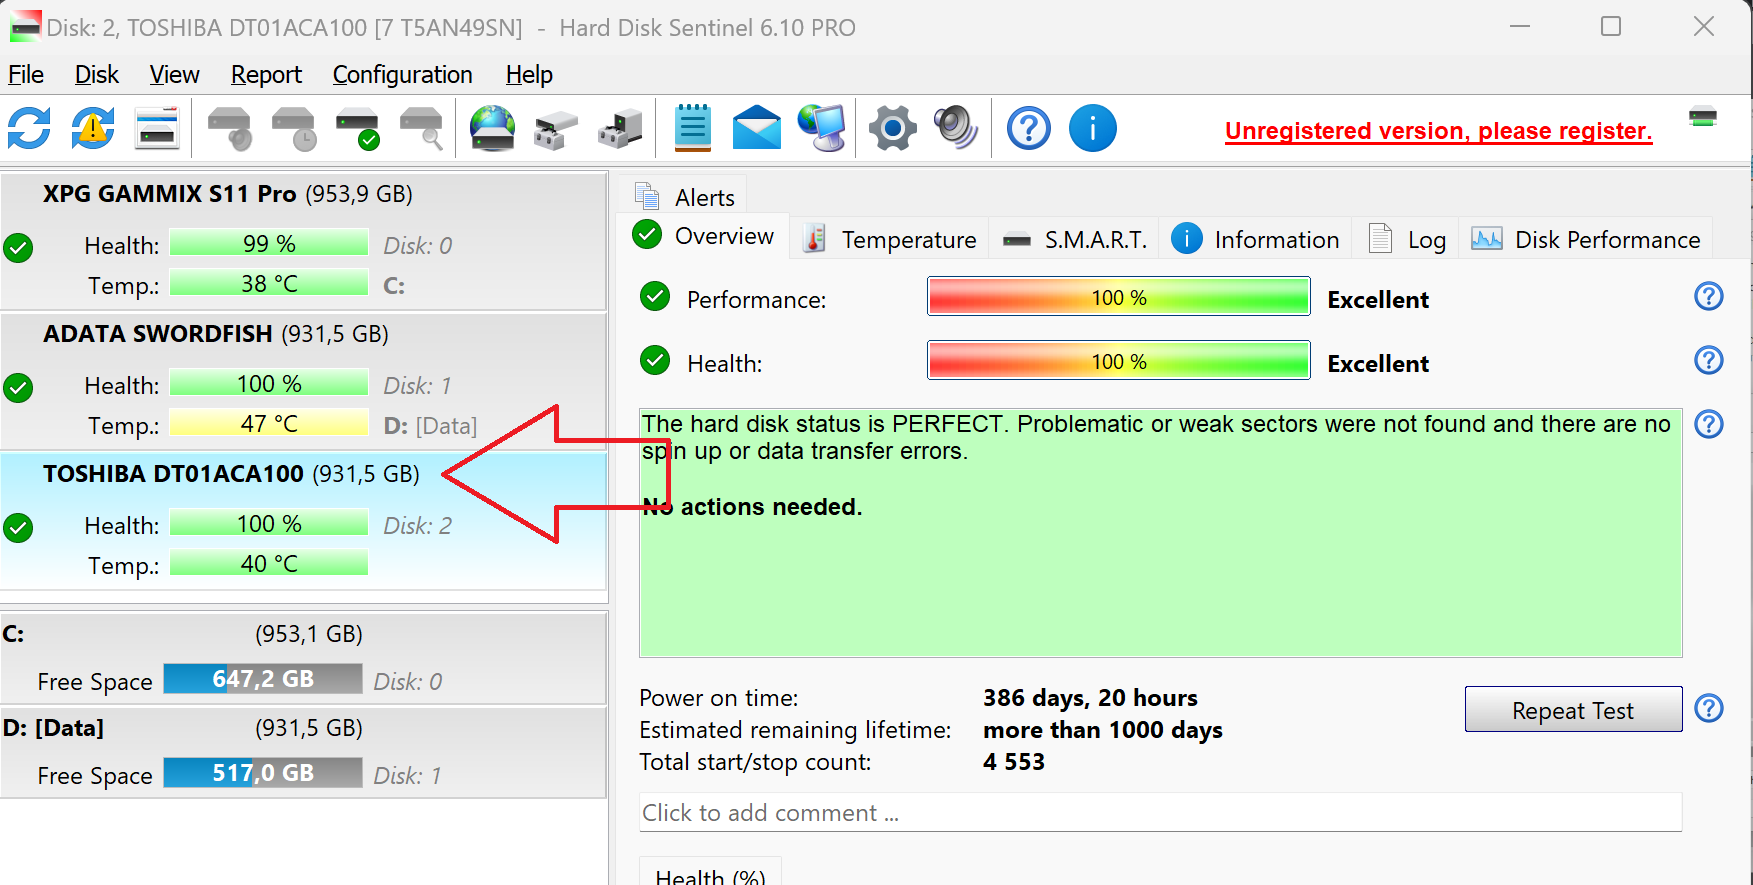
5. Configure HD Sentinel by the graphic interface File -> Configure NAS Monitoring


End result:
6. Final words:
As of the time of writing (23 Jul 2023) running on QTS 5.0.1.2376 crontab schedule is working properly and the configuration survived reboot and QTS update. Whether future versions of QTS will treat crontab in consistent manner is unknown so if your setup stops updating search for autorun/crontab/etc. in the forums for the particular version.